Setting up Newsgroup Software
You must first decide if you need to use something called SSH
tunneling. The general rule of thumb is that if you ever need to post
from off-campus, you should always use SSH tunneling.
- Without SSH tunneling:
- You should be able to connect to the newsgroup server and read posts whether
you are on or off campus.
- You should be able to post to the newsgroup only if you are on campus.
- With SSH tunneling:
- You should be able to connect to the newsgroup server, read posts, and write
posts, whether you are on campus or off campus.
Note: While residence is considered on campus, there have been reports that students are unable
to connect to the newsgroup server while using ResNet. However, SSH tunneling has
reportedly been able to allow you to connect.
Setting up Thunderbird
-
Download and install
Thunderbird.
-
You will be prompted to create a new account. If not, you can create a new account by
going to File → New → Other Accounts...
-
 Select "Newsgroup account" and click Next.
-
 Enter your name and userid@uwaterloo.ca email address and click Next. This only
affects what others see when they look at your posts.
Enter your name and userid@uwaterloo.ca email address and click Next. This only
affects what others see when they look at your posts.
-
 For Newsgroup Server, enter news.cs.uwaterloo.ca and click Next.
-
For Account Name, pick something like "News Account" and click Next and then Finish. This
name is only a reference within your Thunderbird client.
If you are off-campus or on ResNet, you will need to set up SSH Tunneling (below)
before continuing to step 7.
-
 Right-click on "News Account" (in this example) and select Subscribe.... This is a list
of newsgroups you may subscribe to, but we'll filter it for cs135. For Show items that
contain:, enter cs.cs135. Click the box for uw.cs.cs135 so that a checkmark
appears and click OK.
Right-click on "News Account" (in this example) and select Subscribe.... This is a list
of newsgroups you may subscribe to, but we'll filter it for cs135. For Show items that
contain:, enter cs.cs135. Click the box for uw.cs.cs135 so that a checkmark
appears and click OK.
-
 Use the expand arrow next to "News Account" to see the newsgroup(s) you subscribed to. If
there aren't messages there already, you can right-click on it and select Get
Messages. If you are presented with a dialog that asks how many headers do download,
choose to download all of the headers. Otherwise, you may miss some of the earliest
posts from the course.
Use the expand arrow next to "News Account" to see the newsgroup(s) you subscribed to. If
there aren't messages there already, you can right-click on it and select Get
Messages. If you are presented with a dialog that asks how many headers do download,
choose to download all of the headers. Otherwise, you may miss some of the earliest
posts from the course.
You should now be able to read and post messages. If something went wrong, make sure that you
followed the steps exactly.
Setting up SSH Tunneling
Windows
-
Download putty.exe.
There is no installation; run it.
-
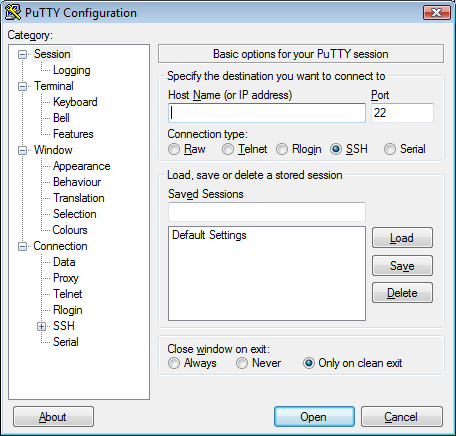 In the category box on the left, make sure "Session" is selected. This page is
where you can save and load settings for future use. Do nothing here for now.
In the category box on the left, make sure "Session" is selected. This page is
where you can save and load settings for future use. Do nothing here for now.
-
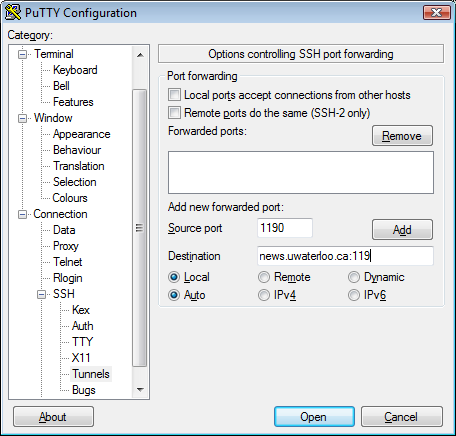 In the category box, under Connection → SSH, select Tunnels. For Source port,
enter 1190. For Destination, enter news.cs.uwaterloo.ca:119. All
other settings should be left as their default. Click Add. This tells PuTTY where to
tunnel and what ports to use.
In the category box, under Connection → SSH, select Tunnels. For Source port,
enter 1190. For Destination, enter news.cs.uwaterloo.ca:119. All
other settings should be left as their default. Click Add. This tells PuTTY where to
tunnel and what ports to use.
-
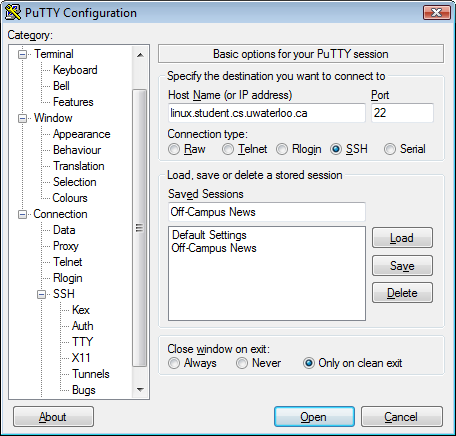 In the category box, select Session. For Host Name, enter
linux.student.cs.uwaterloo.ca. Make sure Port is 22 and Connection
type is SSH. All the settings are ready. For Saved Sessions, enter
Off-Campus News and click Save. Next time you open PuTTY, you can select
Off-Campus News and click Load. Click Open at the bottom.
In the category box, select Session. For Host Name, enter
linux.student.cs.uwaterloo.ca. Make sure Port is 22 and Connection
type is SSH. All the settings are ready. For Saved Sessions, enter
Off-Campus News and click Save. Next time you open PuTTY, you can select
Off-Campus News and click Load. Click Open at the bottom.
-
 The first time you connect to the student.cs environment, you may get a security warning.
Click Yes.
The first time you connect to the student.cs environment, you may get a security warning.
Click Yes.
-
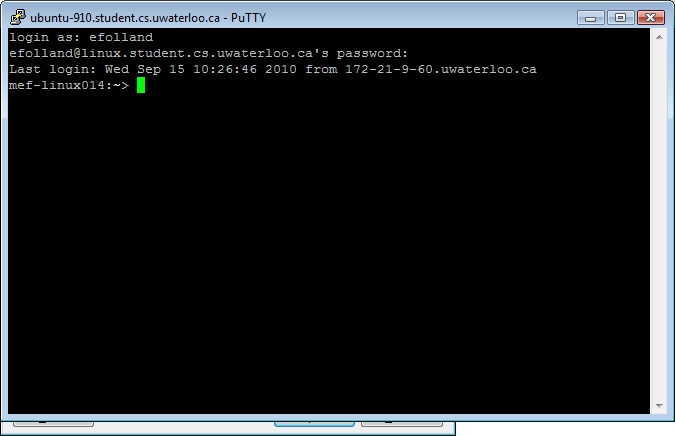
A new window appears with "login as:". Enter your Quest userID and unix password.
While typing your password, it will not display any characters. If you don't
yet have a unix password, you can set one here:
https://www.student.cs.uwaterloo.ca/password/
If you see a unix prompt, your SSH tunnel is ready for Thunderbird to use. Leave
PuTTY running.
-
In Thunderbird, right-click on your new account on the left side ("News Account") and
select Settings.... Just below the highlighted entry on the left side, select Server
Settings. For Server Name, change the value to localhost. This will tell
Thunderbird to use the SSH tunnel you've set up. For Port, change the value to
1190. This matches the Source port you entered in PuTTY. Click OK.
Mac
-
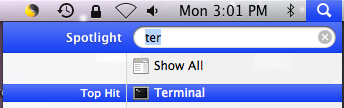 Open a terminal window. One way to do this is by searching in Spotlight:
- Click on the magnifying glass icon in the top-right of your screen.
- For Spotlight, enter terminal and press Enter once Terminal is
highlighted.
- Enter the following all on one line:
ssh -N -L 1190:news.uwaterloo.ca:119 userID@linux.student.cs.uwaterloo.ca
The server will ask for your unix password. Your userID is your Quest userID. If you don't
yet have a unix password, you can set one here:
https://www.student.cs.uwaterloo.ca/password/
- If you see a unix prompt, your SSH tunnel is ready for Thunderbird to use. Leave the
terminal running.
- In Thunderbird, right-click on your new account on the left side ("News Account") and
select Settings.... Just below the highlighted entry on the left side, select Server
Settings. For Server Name, change the value to localhost. This will tell
Thunderbird to use the SSH tunnel you've set up. For Port, change the value to
1190. This matches the port you entered in the terminal. Click OK.
Linux
- Open a terminal window.
- Enter the following all on one line:
ssh -N -L 1190:news.uwaterloo.ca:119 userID@linux.student.cs.uwaterloo.ca
The server will ask for your unix password. Your userID is your Quest userID. If you don't
yet have a unix password, you can set one here:
https://www.student.cs.uwaterloo.ca/password/
- If you see a unix prompt, your SSH tunnel is ready for Thunderbird to use. Leave the
terminal running.
- In Thunderbird, right-click on your new account on the left side ("News Account") and
select Settings.... Just below the highlighted entry on the left side, select Server
Settings. For Server Name, change the value to localhost. This will tell
Thunderbird to use the SSH tunnel you've set up. For Port, change the value to
1190. This matches the port you entered in the terminal. Click OK.